This video focusses on aquascape maintenance. You can use the info as a guide for completing essential maintenance on your aquascapes.
Learn how The Green Machine team maintains our beautiful Nature Aquariums.
Video Timecodes
- 00:48 Water Change
- 01:35 Gravel Cleaning
- 02:55 Dead Leaf Removal
- 03:23 Debris Removal
- 03:53 Aquarium Cleaning
- 05:00 Syphon
- 06:00 Gravel & Sand Adjustments
- 07:31 Sand Freshening
- 08:31 Stone & Rock Cleaning
- 09:35 Gravel Freshening
- 10:29 Finished Shots
Video Transcript
00:00
Welcome back to The Green Machine- the Nature Aquarium Specialists.
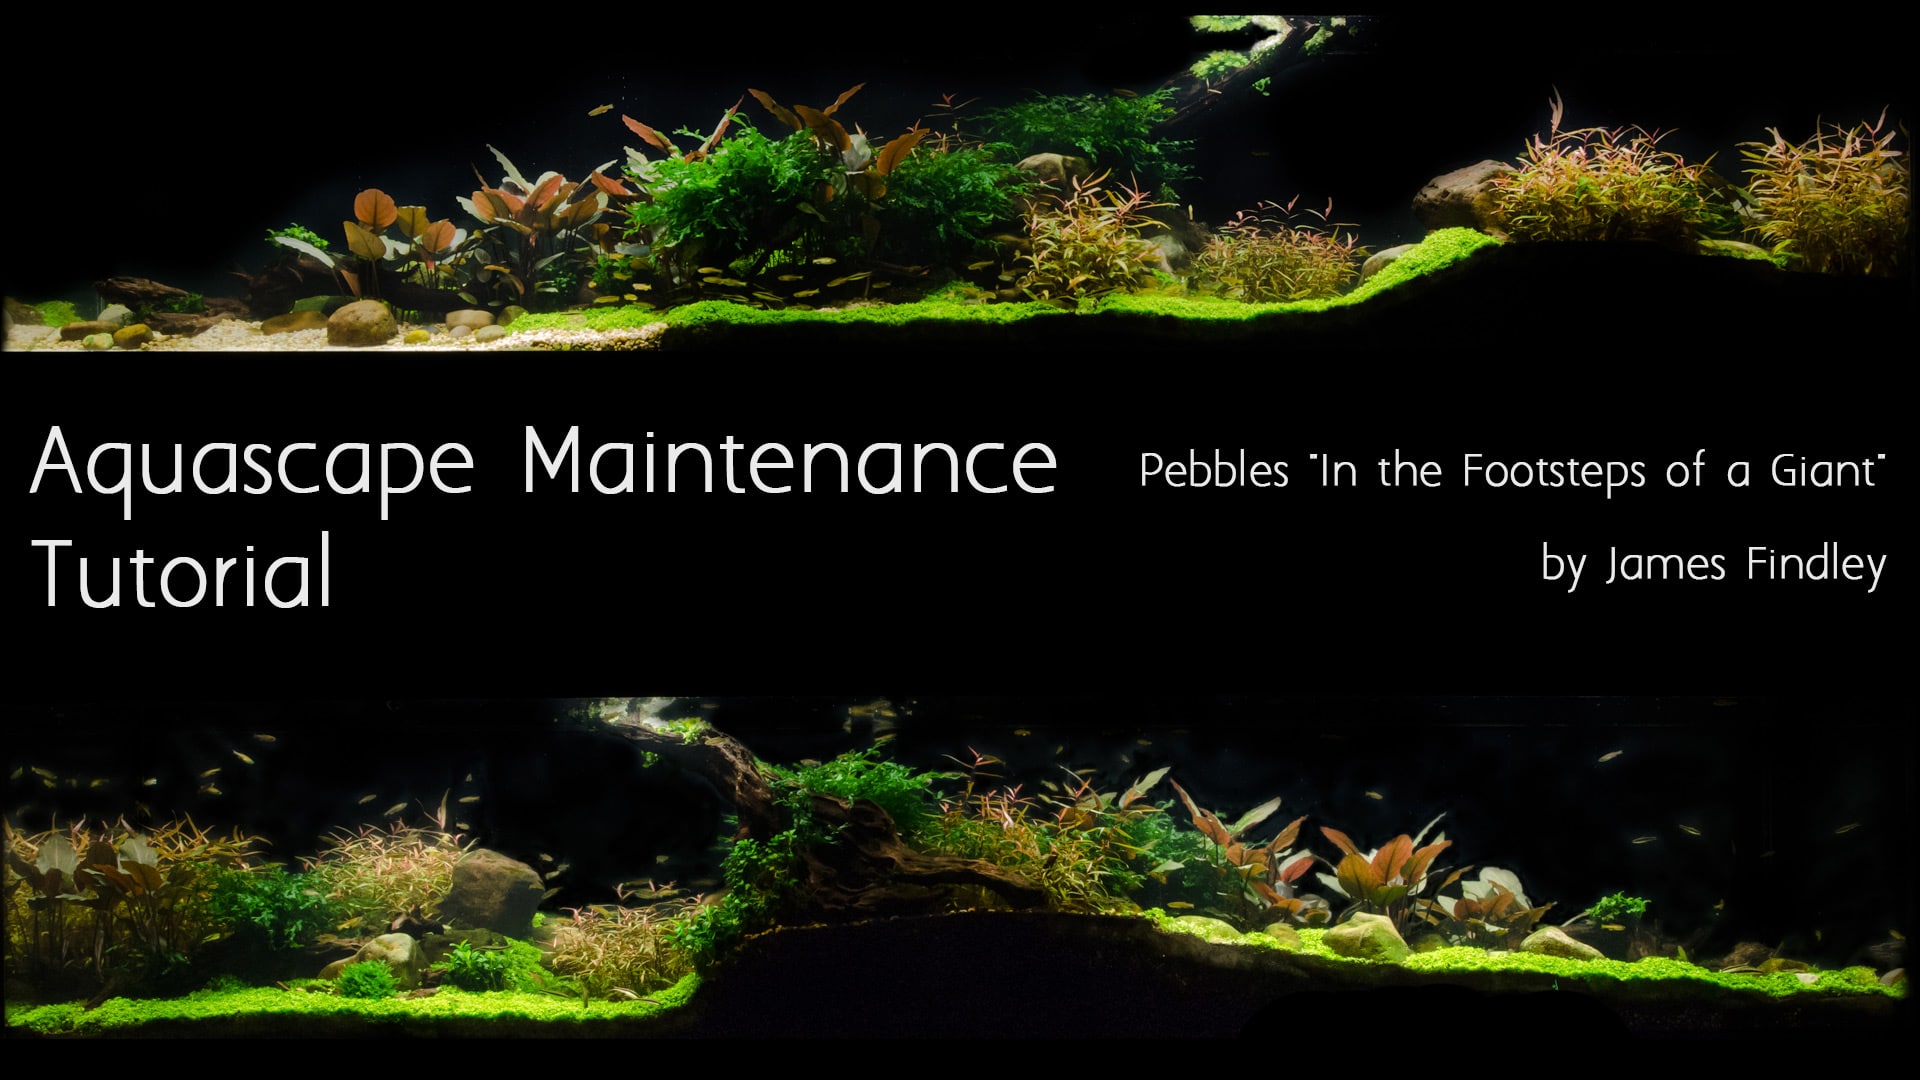
In this video you will see the TGM team carrying out essential maintenance work on the aquascape titled ‘Pebbles – In the footsteps of a giant’ which was planted by pro aquascaper and founder of The Green Machine – James Findley, who dedicated this scope to the late aquascaping master Mr Takashi Amano.
This video covers the maintenance work which was done the day before the final grown-in footage was shot, in order to get the layout looking it’s best. You can use the techniques covered in this video as a weekly maintenance regime or to prepare your aquascape for a special day, event or photo shoot. You can see the step by step creation of this aquascape in another video here.
These images were shot the day after the maintenance work was completed. As you can see- it looks very striking and neat.
00:48
Now we move back to the previous day.
The aquarium is ready for maintenance work which is carried out by the TGM team.
The first step is to begin a water change by starting to drain the aquarium. In this case a hose pipe is used to slowly syphon the water into a nearby sink. Water changes are necessary to keep an aquascape healthy for living organisms. You could also use an electric pump for this task.
Further maintenance is carried out while the aquarium slowly drains. Due to the large 1200 litre size of this aquarium it will drain fairly slowly.
01:35
Now the gravel is cleaned using a syphon. This tool allows water to be sucked out of the aquarium and into a container like a bucket.
As you can see the tool is used to agitate the gravel surface and lots of dark detritus can be seen getting sucked up the tube.
This is done across all of the sand, gravel and carpeting plants on the base of the aquarium.
When using a syphon for this task one must be careful not to suck up any fish or shrimp.
As you can see, there are a lot of dirt particles which are being effectively removed using this technique. The particles are in part made up of fish waste and dead plant matter.
02:32
02:55
Now dead and damaged leaves are carefully removed from plants using trimming scissors. These can then be disposed of.
03:23
Other plants are shaken by hand to remove and small pieces of debris which may have gotten caught in and around the growth.
The bits that fall away will usually rise tot he surface of the water where they can easily be collected by a net or using an electric surface skimmer such as the ADA Vuppa. Any pieces that fall to the bottom may be removed using a syphon.
03:53
Now the acrylic is cleaned using a special cleaning pad designed for acrylic, which is softer than glass and prone to scratching if one is not careful or uses the wrong material.
A scrubbing motion is used to remove thin layers of algae which start to build up on aquarium walls when left without maintenance.
This scrubbing is done right around each interior side of the aquarium, the aim is to scrub every inch. This is a much easier task on smaller aquariums.
05:00
A syphon with a smaller tube can be used to remove larger pieces of detritus and displaced stones from the base of the aquarium. They have a stronger suction and are easier to direct at smaller areas.
06:00
A Sand Flattener is used to flatten gravel and sand, moving it into your desired positions. Over time gravels and sands can become displaced by water movement or fish. This technique gets everything back in place and in line with the artist’s original vision for the layout.
Again, this is done through the whole layout and can greatly effect the overall aesthetic of the aquarium.
07:31
If some discolouration of the top layer of lighter sands has occurred, you may wish to add a thin layer of fresh sand of the same variety. This will brighten the look of the sandy area. Here you can see it being poured using a jug which allows for fairly accurate placement of the fresh layer of sand. Again, this should be spread into place using a sand flattener.
08:31
If desired, stones and rocks can be brushed to remove green vegetative colouring caused by algae. Here a wire brush is used which is highly abrasive and therefore very effective at removing algae buildup. Smaller stones may be removed from the aquarium to make this process easier and then replaced in their original locations. Larger stones may be too heavy or may damage the layout if removed, in this case they can be brushed while in position the aquarium.
09:35
Fresh gravel may be sprinkled on top of older layers in order to brighten it up. You can see that some older pieces of gravel have developed a green layer of algae which makes them darker, less striking and arguably less aesthetically pleasing.
It is also an option to remove the top layer of gravel by hand, clean it and then replace it in the aquarium. This method would be easier in a smaller aquarium.
10:09
While carrying out maintenance you may spot things like stray pieces of plants which you can remove by hand.
The aquarium is now topped back up with water. At The Green Machine, Reverse Osmosis (abbreviated to ‘R.O.’) filtered water is used. R.O. purification removes any potentially toxic molecules which may be present in tap water.
10:29
The maintenance is done the day before to allow time for the filter to clear any particles from the water, resulting in higher clarity. This is especially important for larger aquariums where a larger amount of water can result in a greater perceived cloudiness.
Now you can see the finished aquarium, it is much more striking than before the maintenance was carried out.
If you would like to see how this aquascape was created from scratch, we have a step by step video which has been available for some time. This video goes into detail about each stage of creating this huge supertank- including substrate, hardscape, plants and grown in shots.
The fish you can see are Leopard Danio, Zebra Danio, Siamensis Crossocheilus, Sphaerichthys osphromenoides (Chocolate gourami). Some Amano Shrimp also inhabit this micro eco-system.
We hope you have enjoyed watching this video. You can find many similar videos on our website at www.thegreenmachineonline.com
We also have many articles and photos of aquascapes, and a nature aquarium online store where you can get everything you need to create beautiful aquascapes like this one. including live aquatic plants, aquariums, stands, tools and more.
Thank you so much for this lovely helpful video – I have bookmarked it on my computer! A really wonderful tank, and great to see that the fish enjoy the cleaning so much and ‘ help ‘ with the rock cleaning. Inspirational.