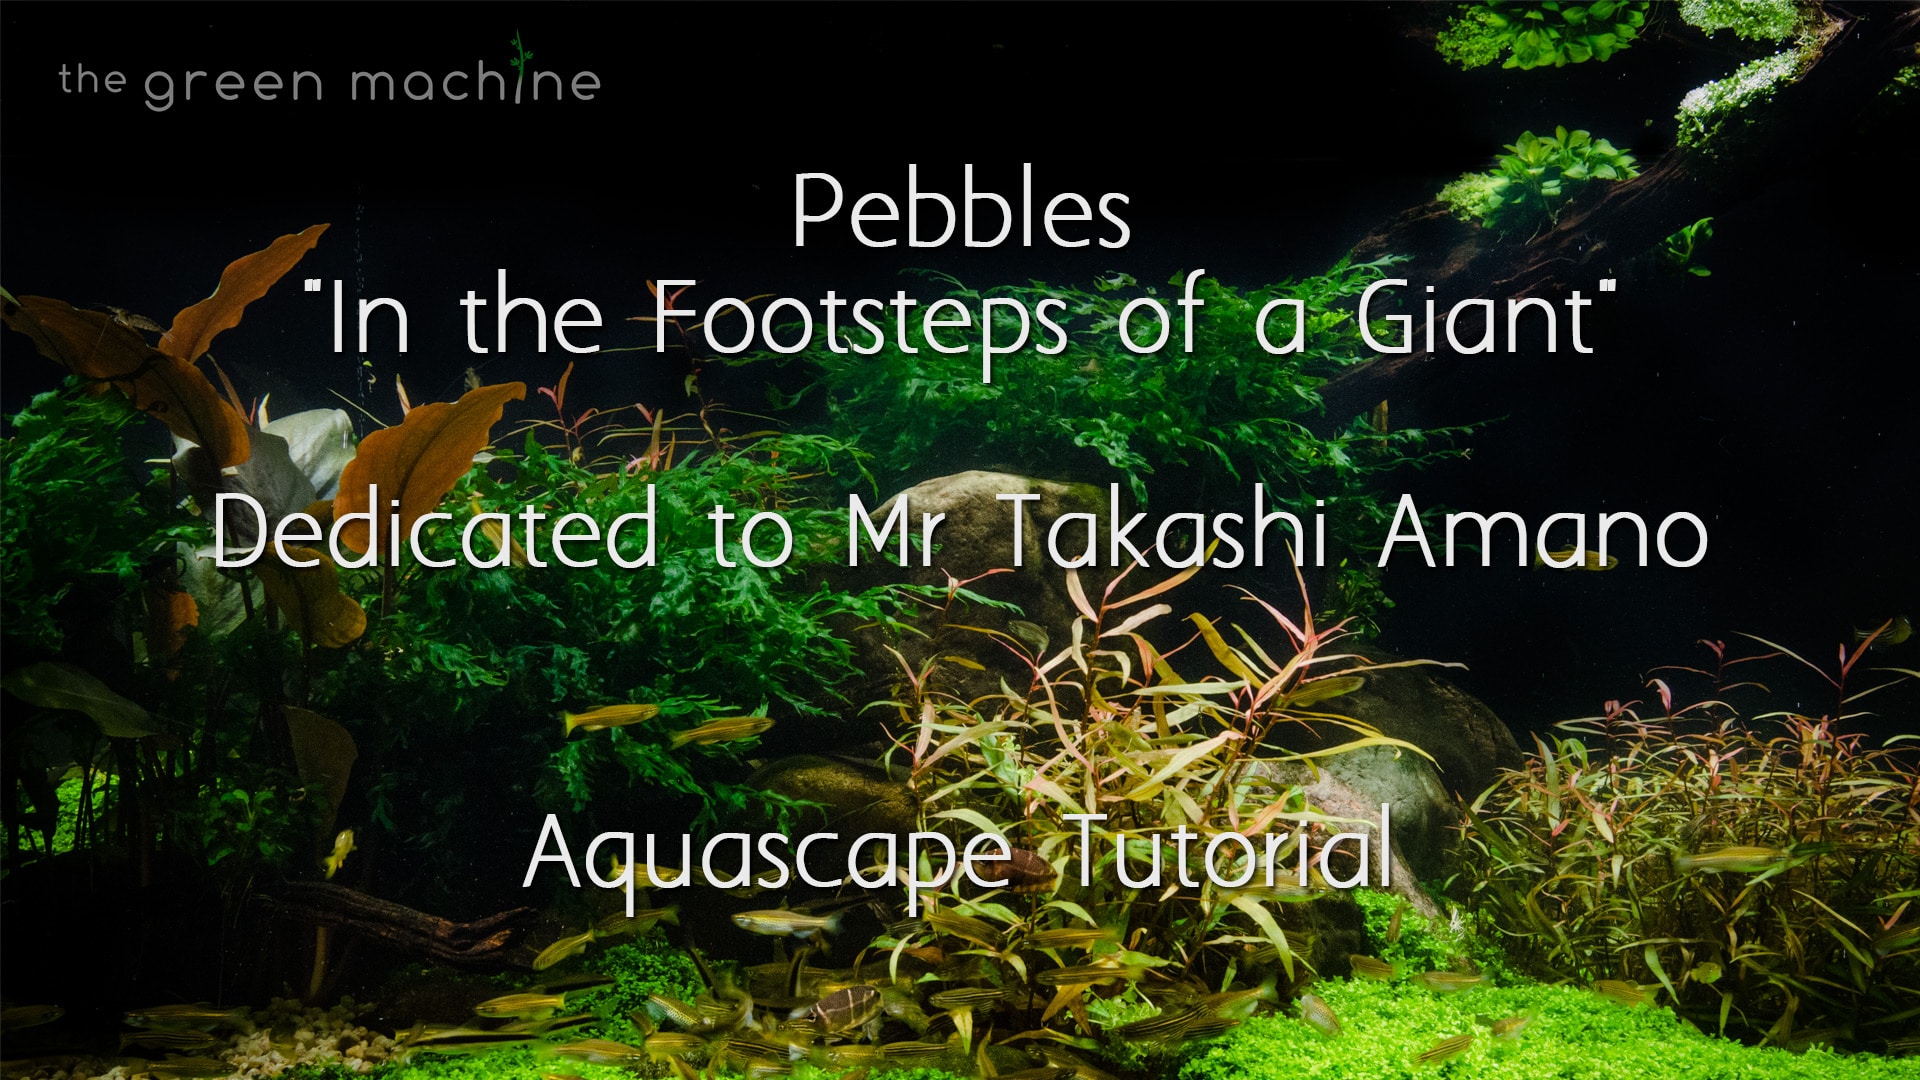
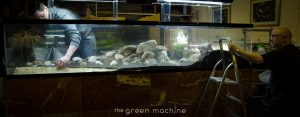
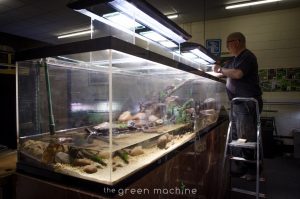
In this video you will see professional aquascaper and founder of The Green Machine; James Findley, creating a stunning planted tank in a huge 300x60x60cm aquarium.
Whilst creating this video, we were all deeply saddened to hear of the loss of the photographer, designer and aquascaper ; Mr Takashi Amano, who was the pioneer that first started injecting aquariums with carbon dioxide which enabled the nature aquarium to be possible.
He also founded and directed the company Aqua Design Amano, known as ADA, who are the worlds leading manufacturer of nature aquarium goods. Mr Amano has been an inspiration to the aquascaping community worldwide, as well as to all of us here at The Green Machine. Without Mr Amano The Green Machine would not exist as it does today. His legacy will live on the hearts minds and creations of all aquascapers. It is for these reasons that James Findley has renamed this aquascape Pebbles- “In the Footsteps of a Giant”, in honour of Mr Amano.
https://youtu.be/EndDgX28dK8
Setup Specification: Coming soon!
Plants
- Bolbitis Heudelotii
- Lagenandre Meeboldii ‘Red’
- Micranthemum Monte Carlo
- Polygonum sp ‘Red’
- Cryptocoryne balansae (later replaced with Polygonum sp)
Fish
- Leopard Danio
- Zebra Danio
- Siamensis Crossocheilus
- Sphaerichthys osphromenoides (Chocolate gourami)
- Amano Shrimp
Photo Gallery


Video Transcript
00:00
Welcome back to The Green Machine- the nature aquarium specialists.
In this video you will see professional aquascaper and founder of The Green Machine; James Findley, creating a stunning planted tank in a huge 300 by 60 by 60cm aquarium.
Whilst creating this video, we were all deeply saddened to hear of the loss of the photographer, designer and aquascaper; Mr Takashi Amano, who was the pioneer that first started injecting aquariums with carbon dioxide which enabled the nature aquarium to be possible.
He also founded and directed the company Aqua Design Amano, known as ADA, who are the worlds leading manufacturer of nature aquarium goods. Mr Amano has been an inspiration to the aquascaping community worldwide, as well as to all of us here at The Green Machine. Without Mr Amano The Green Machine would not exist as it does today. His legacy will live on the hearts minds and creations of all aquascapers. It is for these reasons that James Findley has renamed this aquascape Pebbles- “In the Footsteps of a Giant”, in honour of Mr Amano.
1:00
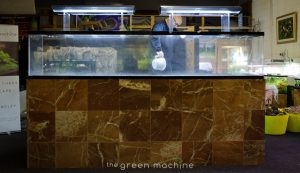
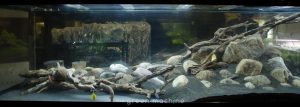
Here you can see the finished, grown in aquascape, some 12 months after its initial creation. Now we’ll take you back in time to the empty tank which is located in The Green Machine’s gallery shop.
1:34
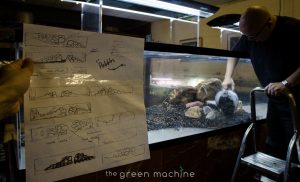
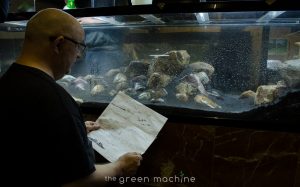
For this creation James pre-planned his design on paper, here you can see him communicating his vision to some of the TGM team.
1:47
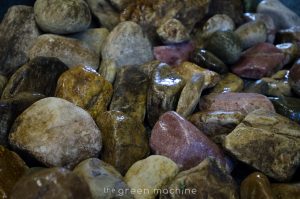
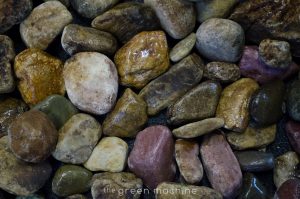
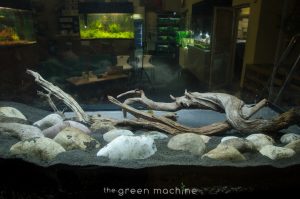
For the hardscape he chose to use TGM River Pebbles along with ADA Horn Wood. James only ever works with 100% natural hardscape materials as he likes to replicate nature as closely as possible.
1:57
This aquascape posed an interesting challenge because it can be viewed from all sides, in a full 360 degrees. Usually tanks are positioned with their back to the wall and only have 3 visible sides. Not many aquascapers have worked on a 360 degree aquarium. Aquascapes are 3-D living sculptures which change over time and it takes skill to make them look good from all angles. We have other videos on our you tube channel demonstrating James designing other 360 degree aquascapes.
2:25
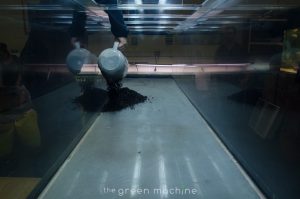
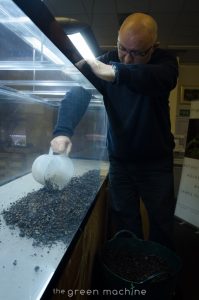
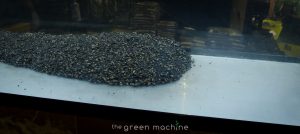
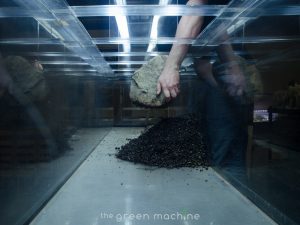
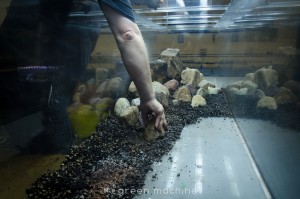
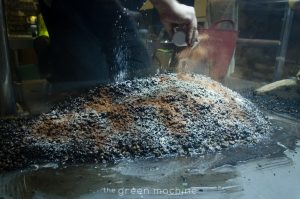
The first stage in creating any aquascape is to assemble the substrate layer. Here you can see James adding ADA Power Sand Special as a base layer.
2:40
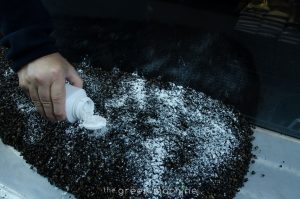
ADA Power Sand Special has a very large surface area which is ideal for encouraging colonies of beneficial bacteria to live in. these provide natural filtration to keep your aquarium healthy. On top of this is sprinkled ADA Penac P and ADA Penac W.
Penac P intensifies the development of hair roots and soil microbes, thus intensifying the amount of nutrients available to the plants. Whilst Penac W prevents the substrate from becoming anaerobic- oxygen is essential for plant root health.
James also adds some ADA Clear Super, which is made of highly refined activated carbon powder mixed with several nutrients which promote the growth of beneficial nitrifying bacteria. This helps keep the water crystal clear. He also adds ADA Bacter 100, which contains many kinds of microorganisms in a dormant state. This improves the conditions in the substrate and the aquarium water, and stabilises the eco system within the aquarium. He now adds ADA Tourmaline BC which is a mineral compound of iron, aluminium, sodium, boron, lithium and magnesium, which are gradually dissolved, enriching the water and helping plant roots uptake essential nutrients.
3:57
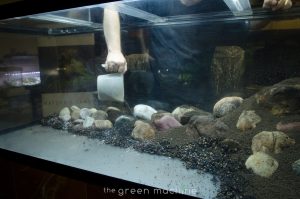
James now adds even more power sand special on top of the substrate additives. This has two benefits; 1, it creates a healthy environment for plant roots and 2- it builds up height in the substrate, to aid in the layout.
James often likes to build up great height in areas of his substrate layer to enable him to place hardscape that reaches to the top of the aquarium, resulting in more dynamic layouts.
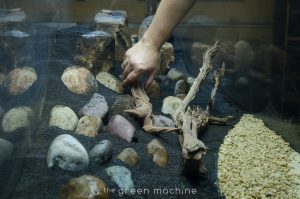
4:41 (Hardscape begins)
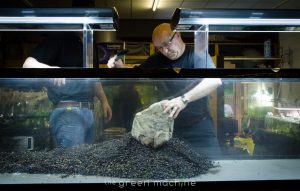
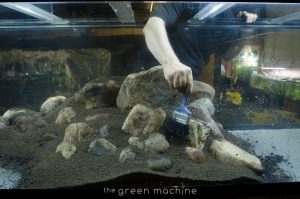
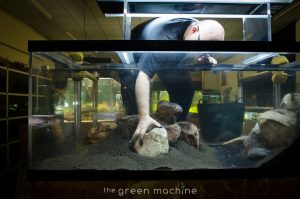
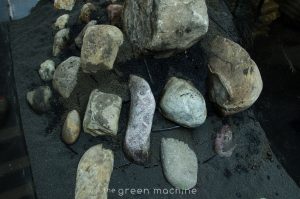
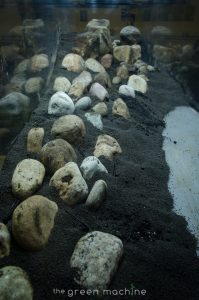
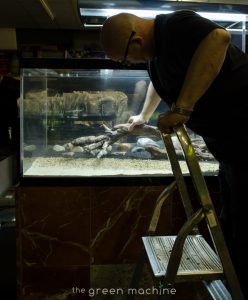
James now places one of the main stones on top of this substrate. The placing of main stones is very important because of the impact they have on the entire layout. It also becomes difficult to change their positions later in the creative process because other rocks may be leaning on them and or it may disrupt the substrate structure.
As James places the stone he uses a paint brush to shape the substrate around the rock to stabilise it in its desired position.
5:21
Before he started, James had sketched a design, however this didn’t include the specific rocks used in the aquascape. There is still an element of improvisation at this stage despite his prior planning as he picks the rocks one by one. This will have a massive effect on the overall aesthetics of the finished design. When working with super tanks of this size it is always a challenge to place hardscape, as it is impossible to position it your self whilst looking at the aquarium, so working with a team can be helpful for tanks of this size.
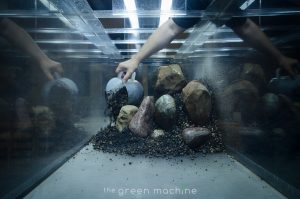
6:05
As more rocks are placed, James uses them to further support surrounding rocks, almost like a dry stone wall technique. This can be fiddly at times to get right so a degree of patience may be required.
It is usual for the aquascaper to change their mind several times during this process, further adjusting rock positions or removing or replacing them until satisfied.
You can read about rock placement in several articles on our website… one such article explains fully the theory behind ‘Iwagumi’ layout design- aquascapes which consist only of stones, with no wood. Iwagumi aquascapes can be striking in their beauty and are easier to create than aquascapes that feature both wood and stone.
Mr Takashi Amano was a master of aquatic layout design, James has drawn much inspiration from his work over the years.
7:27
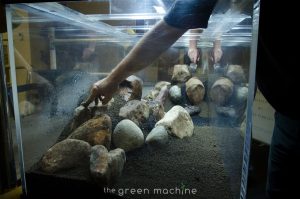
To further increase stability, more substrate is poured into the gaps around the rocks and then brushed into position.
At this stage the challenge is getting the first rocks to stay in their desired positions.
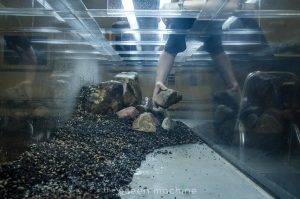
James continues to select smaller stones and lay them across this area of substrate which will eventually be full of plants.
When placing rocks one must keep in mind the spaces in between where plants may be placed later.
If you have experience with many varieties of aquatic plant, you should start to have ideas about what to place where at this stage. Larger plants may entirely mask hardscape, while smaller growing plants can soften their edges and provide colour contrasts.
There is plenty to think about throughout the whole process of creating a nature aquarium layout.
7:56
The substrate is sprayed with water in order to help it settle and stick together.
Another benefit to using power sand special as the base layer is that its large weighty pieces provide good stability to build hardscape on top of. This is certainly better for building on than using only the small lighter grains that you find in ADA Aqua Soil, which provide a less stable foundation.
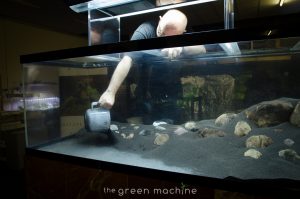
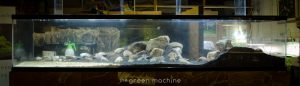
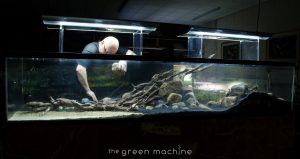
Now that the main structure is in place, James begins adding the smaller surrounding stones one by one, constantly reviewing the progressing layout from all angles as he works. (*may need filling out)
You can see that the main placement of stones is about 16-17 inches high at its highest. James believes that if you can add height in a tank it adds great interest and can better replicate a natural landscape.
10:16
A second area of power sand special is now added at the opposite end of the aquarium in a similar manner to what you have just seen. Substrate additives are added as before. Once the substrate has been added stones are placed on the opposite end of the aquarium creating a second structural raised area within the design.
James tried to create natural feeling flow from one grouping of stones into the other. This takes the form of a letter ‘S’ when viewed from above, effectively creating a valley between the two groupings.
Moving forward in time ADA Aqua Soil has now been added on top of the power sand. Aqua soil is a complete substrate and may be used on its own, but for optimum results and planted tank longevity we always recommend using Power Sand Special beneath it. This area is now ready for planting once the hardscape is completed.
Where extra height is required in a planted tank, James believes that Power Sand Special is an indispensable commodity in achieving this.
James always advises that aquascapers take their time over their hardscape placement as it provides the bones of the aquascape, upon which your design is built.
11:58
An area is left clear of substrate where decorative sand will be added and no plants will be growing. Over time plants will find it hard to spread into areas filled only with decorative sand as they are much less nutrient rich and will have less oxygen for the plants. This makes maintenance easier over time.
12:07 (Substrate Supports)
Now that all of the stones have been placed, James adds TGM Substrate Supports which he designed as a solution to an issue that aquascapers all around the world have been facing. it is difficult to create height in an aquarium without substrate supports, over time the substrate rolls down to the bottom of the aquarium, destroying your layout.
TGM Substrate Supports are used by inserting them into the substrate around the hardscape, especially in steeper areas. Here you can see them slightly protruding from the substrate. James has left them showing slightly, so that you can see how much he uses them.
Since their invention, they have become a key component in James’ layouts and have enabled him to experiment with great height in his layouts that would otherwise be impossible. They will later be covered by brushing the substrate over them to conceal them.
Because of their very small exposed surface area they will have a minimal impact on planting.
13:29
Here you can see the low lying valley which weaves diagonally through the layout contrasting with the two areas of high ground on either side.
This creates a low lying extended ‘S’ shape along the whole length of the tank when viewed from above. This shape has an interesting effect when walking around the aquascape, as new micro layouts seem to constantly appear from each new angle and position.
14:19
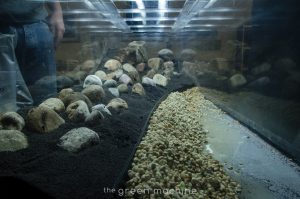
It is now time to add the decorative sand. James uses a long section of substrate support as a temporary barrier to keep the decorative sand and the aqua soil apart. This is manually held in place until there is enough sand to prevent it from moving. Again a paintbrush is used to smooth the sand into position.
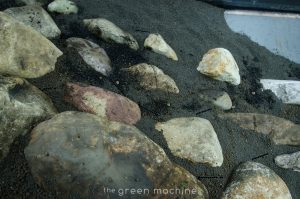
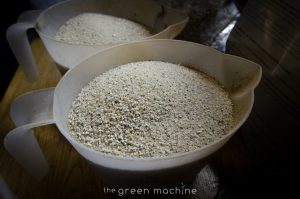
The sand being added is ADA La Plata ‘Big’, which is a very bright white coloured sand with large gravel sized grains which brightens up considerable when the tank is lit from above.
15:35
Notice how James and his team make the Aqua Soil and La Plata Sand the same height before the divider is removed. This prevents one side collapsing on top of the other if the heights are uneven- resulting in a messy edge.
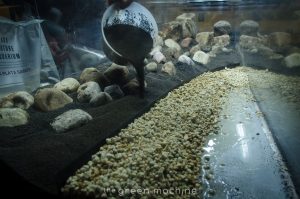
Once again a jug is used for precision aqua soil placement.
16:30
Here the La Plata Big is being moved closer to the divider to match the height of the aqua soil.
16:42
A jug is a useful tool for pouring substrate material into key locations.
16:50
Now a finer sand is added- this is called ADA La Plata sand which matches the colour of the larger grain variety previously added. The mixing of these 2 grain sizes creates a very natural effect often seen on sandbanks etc in nature. This is known as gradation.
17:17
Some of the large grains are sprinkled onto the smaller grains, and some of the smaller grains are brushed onto the lager grains to create the desired effect.
Any pieces that accidentally land on the opposite side of the divider are manually moved back onto the intended side.
You can learn more about this gravel grading technique in the articles and journals on our website so browse our website if you’d like to take a look.
18:32
The substrate is sprayed with water to help it settle better so it is less likely to move.
Here you can catch a glimpse of James’ hand drawn plans for this layout.
19:11
As the camera moves around the aquarium you can see the final placement of the stones from all angles. The shapes of the formations are visible. The very straight edge between the sand and the aqua soil will eventually soften when plants are grown in.
19:51
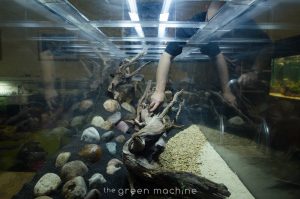
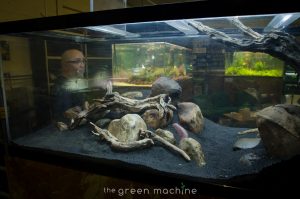
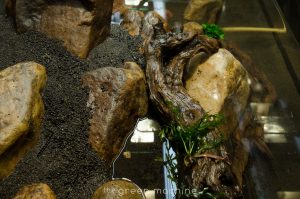
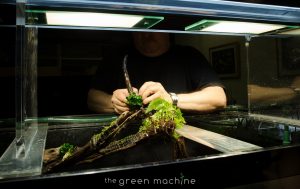
Now it’s time to add the ADA Horn Wood. James places each piece one by one, observing the impact each has on the layout and tweaking them until he is happy.
It is extremely challenging to use both wood and stone together in an aquascape layout, one has to be extremely careful that both wood and stone work together in harmony and that one does not negatively impact the aesthetics of the other. When a natural look is desired it is important to make sure that the wood looks like it has been placed by the forces of nature and not by the hand of man. To be more specific, wood should follow roughly the implied direction of flow within the tank.
21:39
Now you can start to see James’ vision coming together… with a sense of directional flow created by the wood.
21:17
James is again playing with height within the tank by extending the structure of the layout by taking the hardscape so high that it actually breaks the surface of the water.
22:00
Here you can see the wood working with the stones rather than against them.
23:05
James makes small tweaks to the stones and wood while working on the layout, sculpting it until satisfied with the aesthetetics and feel.
23:25
Now the wood placement is finished. Once more the camera takes us right around the tank, showing many of the viewing angles.
Note the 2 individual shapes created by the large piece of wood that breaks the surface of the water, adding a certain graphic element tot he scape.
24:34
Before filling the aquarium with water, some of the wood is weighed down using some extra stones. This will help prevent any pieces shifting position during or after filling. Unlike other wood, ADA Horn Wood will sink on it’s own without prior soaking or weighing down- we have not found a piece that doesn’t yet. Horn Wood is very unusual in this respect and is also very beautiful in shape. We have not seen anything else quite like it.
The aquarium is now filled with water so that the filter can be primed and started.
25:31
Around 3 weeks later the layout is ready for aquatic plants to be added. The reason for this delay is to allow time for beneficial bacteria to build up in the filter and substrate. This acts as an efficient natural living filter and is essential for a healthy planted tank.
ADA Aqua Soil Amazonia has an ammonia spike in the first 2-3 weeks after adding water to a new layout, which would be bad for plants and livestock, but this is good for helping establish large colonies of beneficial bacteria which break it down, to their benefit. James also enjoys this short ‘waiting’ period because it gives aquascapers a chance to fully review their hardscape layout, allowing time for some changes to be made before planting, if one chooses.
It is also possible to plant on day one, but in this instance one would have to carry out daily 50% water changes for at least 2 weeks. Fish may only be added when the tank is fully cycled- approximately 5-6 weeks after planting, by which time the filter will be able to convert toxic substances to harmless ones.
27:13
The first plants that James adds are various mosses and liverworts which he attaches to several pieces of wood. In order to do this he removes each piece of wood from the aquarium one by one, ties the plants on, and then replaces them in their original location.
27:36
James is uses ADA Riccia Line, wrapping it around the wood many times to secure ‘Vesicularia Dubyana – Christmas Moss’ to the wood.
We’ve sped up this footage so you can see what James is doing faster.
28:08
Now that this piece of wood is ready, James places it back into position in the tank.
The same procedure is repeated for each piece of wood that he wants plants to grow on.
28:47
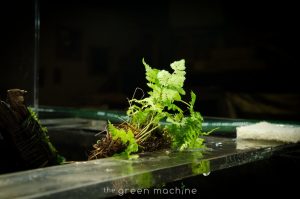
Here James attaches a terrestrial fern for emersed growth- this plant will grow above the water surface.
29:34
Here James adds ‘Bolbitis Heudelotii‘ which will provide some dense cover form above once grown in, which the fish will enjoy. 3 separate groupings of this plant were used to give a sense of continuity in the centre of the tank.
30:36
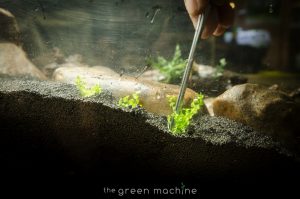
Lagenandre Meeboldii ‘Red’ is prepared by removing rock wool from it’s roots using aquascaping pinsettes and then small groupings of stems being teased apart. the roots are then trimmed before planting directly into the ADA Aqua Soil substrate.
Again James uses pinsettes for this task.
32:39
Cryptocoryne balansae is now added.
33:32
Micranthemum Monte Carlo has been prepared into small planting ‘plugs’. It is planted densely between the stones and will eventually grow into a full ‘carpet’ and will have a softening effect on the whole layout.
34:22
Polygonum sp ‘Red’ is added at this point.
34:34
Planting is now complete and here you can see the aquascape on ‘Day 1’.
At this stage the layout looks a little sparse.
36:09
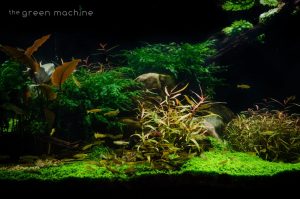
Around 12 months later we re-filmed the now fully grown in aquarium.
The overall effect is stunning. The plants are lush and the cascade of Micranthemum Monte Carlo between the stones gives a very natural effect.
The bright sand provides good contrast from the dark shadowed areas.
James has replaced the Cryptocoryne balansae with four groupings of Polygonum sp which he thought matched the colour of the stones very well and subtly mirrored the colours displayed in the Lagenandre.
These four groupings of Polygonum pull the planting scheme together, as does the Bolbitis centrally.
The fish you can see are Leopard Danio, Zebra Danio, Siamensis Crossocheilus, Sphaerichthys osphromenoides (Chocolate gourami). Some Amano Shrimp also inhabit this micro eco-system.
We hope you have enjoyed watching this video as much s we enjoyed making it.
You can find many more similar videos on our website.
We also have many articles you can read, photos of many aquascapes, and a nature aquarium online store where you can get everything you need to create beautiful aquascapes like this one.
Amano is the master but James Findley has always inspired me a lot for my aquascapes. It’s really nice to see a tribute for Amano by Findley. Thanks for this great work of art.
Master is gone, but his memory will remain forever engraved in our memories and in our hearts.
Rest in peace sensei.
can you landscape with out plants only using pebbles and wood