Video transcript:
Welcome back to The Green Machine, the nature aquarium specialists.
This short video documents the making of Tributary, an aquascape by James Findley.
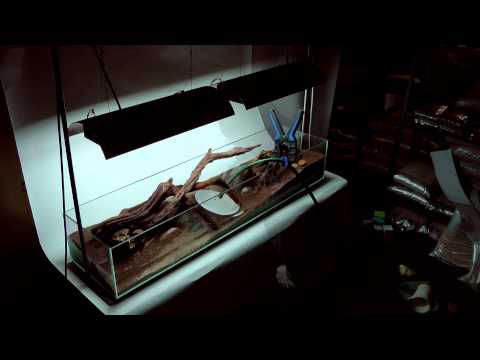
For this work, James decided to use an ADA Cube Garden 120-F shallow aquarium with the dimension of 120cm by 30 by 20. The unusual shape allowed him to experiment in a fun and inventive way. He also wanted to explore emergent plant growth: that is, plants growing above the water level, in the air, and use hardscape that extended outside the traditional parameters of the aquarium. The shallow tank provided the perfect opportunity to do that. James described how this creates a dual perspective in which you can see both above and below the water, where each space is just as beautiful as the other, adding a whole new dimension to the aquascape.
0.59
Here you can see how the aquascape is partitioned so that the sand and nutrient rich substrate can be placed in separate areas. Sand is not suitable for plant growth so it should only be placed in areas in which you do not want plants to grow. It is an excellent natural decorative material that can add an element of light to the layout and draw the eye into the aquascape, which you will see later when it is completed.
In order to separate the areas, place cardboard supports along the dividing lines: these are a temporary measure and will be removed when the substrate is completed.
Next the substrate layer is created: first substrate additives are added to the bottom of the aquarium (but only in the areas that will have substrate placed on them – the areas you will plant in). These are not essential but as this is a display piece James wants it to be perfect. Substrate additives create a better environment for the colonisation of beneficial bacteria which help to maintain the perfect conditions in the aquarium and also assist in preventing the substrate layer from becoming anaerobic. For more information on substrate additives please see our website.
Next, ADA Power Sand Special is added. Again, this is not essential but it does have a huge beneficial effect on the aquarium, making maintenance more easy, so in a show piece it is very useful! Once the power sand is in it is smoothed out with a paint brush to create an even layer and pushed back a couple of centimetres from the front of the layout so that it will not be seen once the aquascape is completed.
Then some further substrate additives are used on top of the power sand (some substrate additives are more effective when placed on top of the power sand, others when placed underneath it)
03.23 Now the ADA Aqua Soil Malaya is added. In order to create this layout James wanted to bank the substrate up very highly in diametrically opposed corners to create the feeling of a natural tributary (this was a bit of an experimental trial run for Reciprocity, a much larger tank which James planted shortly afterwards – videos can be found on our YouTube Channel)
When banking up substrate you need to take care to stop the substrate from surrendering to the forces of gravity and simply rolling back down to the middle of the tank. The standard method for avoiding this was, historically, to place stones under the substrate to hold it up and prevent it from collapsing. This, however, only worked to a certain extent and was an expensive method which also interfered with plant growth because of the large surface area of the stones. To solve this problem, James developed Substrate Supports to allow him to bank the substrate even higher than was previously possible, achieving new and original results, whilst maintaining optimum plant growth.
04.25 ADA Aqua Soil Malaya Powder type is now added. The powder type has smaller granules that are more aesthetically pleasing, particularly in small or nano tanks, or where a sense of scale is desired. The powder type is also easier for planting small plants into and better for encouraging growth of small plants as the smaller granules allow the roots to penetrate and develop more easily. The substrate is then smoothed into the desired shape with a paint brush.
The lighting used for this layout was two ADA Solar II lights, which use fluorescent lamps – a metal halide would have been too strong for a shallow tank like this
05.27 The natural cosmetic sand is now added to the aquascape. This adds an element of light and serves as a focal point, drawing the eye into the layout. For more information on creating good layouts, and the Golden Ratio, visit our website.
06.12 The partitions are now carefully removed so as to avoid disturbing or mixing the sand and substrate.
Then substrate supports are used to separate the two areas – this will stop the granules from spreading over time and also prevent plant roots from entering the sandy area, making maintenance easier.
More substrate supports are then used to bank up the substrate, keeping it secure and preventing it from rolling back down over time. This is a particular risk in the early days before the plant roots are established.
08.36 the hardscape is then completed. James used ADA Horn Wood and TGM River Pebbles. Iron wood is an incredibly beautiful wood that has the benefit of almost always sinking immediately because of its density, and therefore does not need to be soaked before using it. The hardscape was chosen to reflect a natural tributary. The wood is arranged so that it protrudes from the top of the aquarium, adding that extra dimension.
08.59 The tank is then carefully filled with water, so as not to disturb the substrate or hardscape. The use of a plate disperses the water with the minimum disturbance.
09.49 now the plants are added. Cyperus Helferi is added to the opposite corners of the aquarium using pinsettes. This plant was chosen because in the summer months, it will grow emersed (out of water), adding another dimension to the aquascape and fulfilling the initial vision for this scape.
You can now see the overall layout starting to come together: The inspiration for this aquascape came from nature’s microcosm: it is an experiment in the minute. The smallest forms of nature can often go unnoticed, despite being some of the most beautiful. This 120cm aquarium provided the perfect dimensions to experiment with the minute.
James entitled the work ‘Tributary’ because it focuses on the smallest element of the natural stream.
10.32 Hemianthus Callitrichoides Cuba is pushed into the nooks and crannies of the Iron Wood. This can be done by leaving a small amount of the potting material on the plant, which then acts as an anchor when it is pushed into the wood. James explained that he wanted to create a very natural effect and a sense of the passage of time, adding age to the layout: by using this technique it creates the impression that areas of silt that has been deposited by the river over time and plants have naturally taken root and grown in it, as would happen in the wild.
When creating a layout it is important to consider the natural environment as this is the best source of inspiration we have. By finding inspiration in nature and imitating it, we can create the most beautiful aquascapes. The first step is learning to observe and appreciate the natural world – otherwise you can walk past fantastic sources of inspiration without even noticing them!
12.32 ADA Riccia Line is used to attach Vesicularia Ferriei (Weeping Moss) to the ADA Horn Wood as it is almost invisible and does not degrade. The moss should be laid on the wood and then wound tightly and generously with Riccia Line to secure it so that it can grow in.
Mosses add a sense of age to the layout. This is because in the wild mosses take time to grow and become established so we associate them with age. They can add a great sense of beauty to your layout, and make it feel like an ancient river bed rather than a brand new artistic creation! Experiment with mosses and see what a difference it makes to your layout. A good pair of spring scissors are particularly useful for pruning mosses.
13.20 it is important, especially in the first few days, that the emersed plants are kept moist – so keep the water level high enough to ensure that at least the bottom of each plant is in the water so that it can draw water up.
13.39 Anubias Barteri var nana Petite has a very small leaf size, so it is suited to a small aquarium, or a layout in which you want to create a great sense of scale. The potting material is removed carefully with pinsettes and then the plant is attached to the wood using wood tight. Wood tight is the simplest, quickest and easiest way to attach plants to wood or stones, particulary anubias and microsrum species.
A good pair of aquascaping pinsettes is essential for successful planting. Superior tools need not be very expensive, and save you money in the long run because they make it easier to handle the plants without damaging their roots. If plants are not handled properly and the roots are damaged then they may not survive. Good quality pinsettes allow you to separate the plants and place them without pinching them hard and destroying the roots.
14.54 Hydrocotle tripartita was added to the layout because it is a very fast growing plant that will use up any excess nutrients in the water. This tank was planted with uncycled aqua soil so an 80% water change was done every day for the first three weeks. Be careful to keep hydrocotle in check because it is a fast grower!
15.05 Hemianthus callitrichoides cuba is now added to the foreground to create a lush, green, lawn effect. Here you can see the second purpose for good quality pinsettes: when precision planting is required, particularly of small plants, pinsettes allow you to place the plants exactly where you intend them to be – especially when panting around wood and stone. You can see how the aqua soil powder type is easier to plant these small plantlets into: the smaller granules have more of a suctioning effect on the plantlets, keeping them in place far more easily and preventing them from coming loose and simply floating up to the surface of the aquarium. James makes this look easy, but there is a bit of a nack to it that you will soon get with practice.
15.58 Ludwigia repens sp Diamond red is added to the background. The red hue of this plant adds an element of complexity and diversity to the aquascape.
16.22 Microsorum mini is added to the layout. This is a very small species of microsorum – the leaves only grow to a maximum of around 5 inches long and it grows very densely. When the plant is grown emersed (out of water) the leaves are effectively ‘air pruned’ because they grow shorter and more densely. The shorter leaves above water and longer leaves below create a very unusual and beautiful effect.
Later, the glassware was added to complete the layout – the inlet and outlet pipes were placed in the centre by the sandy valley to maximise the flow of water and create a more natural impression since this is where the water would flow in a real stream.
Polygonum sp and Ludwigia arcuata are also added to increase the red elements in the background of the layout and create a faint impression of an almost distant sunset.
Now it is grown in, the Ludwigia is starting to cascade and tumble over the wood, creating a sense of natural chaos.
Normans lamp eye fish and Crystal Red Shrimp are added to the layout to bring it alive. Small fish and shrimp are ideal for Nature Aquariums and allow you to keep a good sense of scale in your layout.
Some graded gravels are added as a finishing touch to create a sense of intricacy and detail.
Finally, some Riccardia Chamedryfolia has been added. This is a tiny liverwort plant that looks beautiful when it is established on stones, and is especially useful in small aquariums.
If you’ve enjoyed this video, visit our YouTube channel to watch more and browse our website for more information on aquascaping and to see our complete range of tried and tested products, so you can create your own aquascapes!