This is a quick aquascape journal by James Findley for a Wabi Kusa using a TGM Substrate Ball.

Here is a tutorial video of this Wabi Kusa Cube being set up by James. Scroll to the bottom of this page for a video transcript.
1. Preparing your TGM Substrate Ball
James used a TGM Substrate Ball which he had pre-prepared for planting. The Substrate Balls come dry and need to be prepared. This will be deailed in the video, and is a very simple process:
– Place a thin layer of your moss of choice over the entire Substrate Ball when it is still dry.
– Tie it tightly with Riccia Line.
– Then immediately place it in a clear, waterproof, plastic bag with an inch or two of water in it
– Place the bag in natural sunlight and leave for 2 or 3 days until the Substrate Ball takes on the moisture and become workable.
Once this has happened it is ready for planting.
2. Preparing your Plant Glass
Pour some sand or gravel of your choice into the Plant Glass. Make sure that the sand/gravel is suitable for aquascaping. This will act as a base for your Wabi Kusa. There are a wide variety of Plant Glasses available – here James used a Plant Glass Cube 1520.
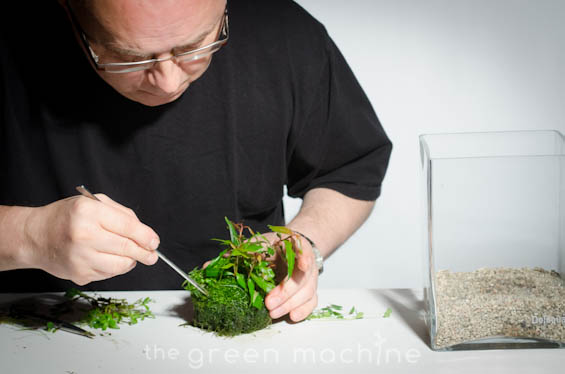
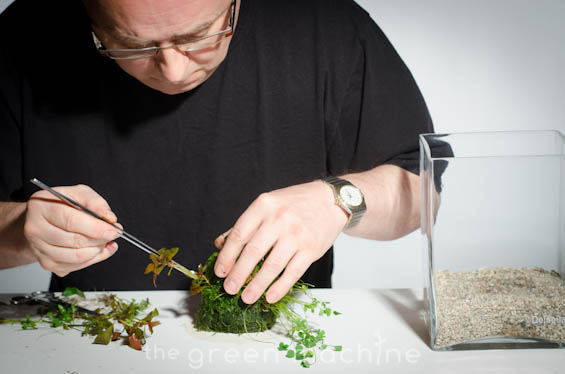
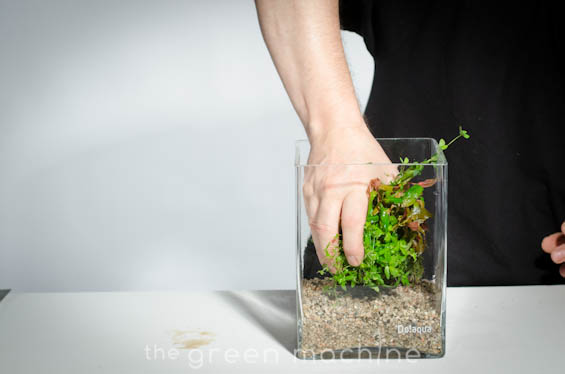
3. Planting your Wabi Kusa
Remove your Substrate Ball from the bag and, with a pair of pinsettes, place holes in the Substrate Ball where you want to put the plants in. Then gently put the stems into the holes. When planting, mist the plants every 5-10 minutes to prevent them from drying out.
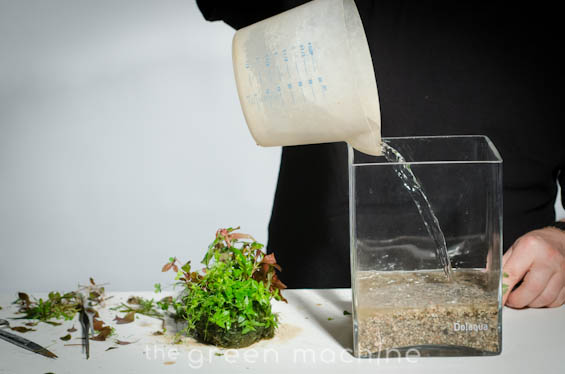
Next, place about 2.5cm of water in the Plant Glass.
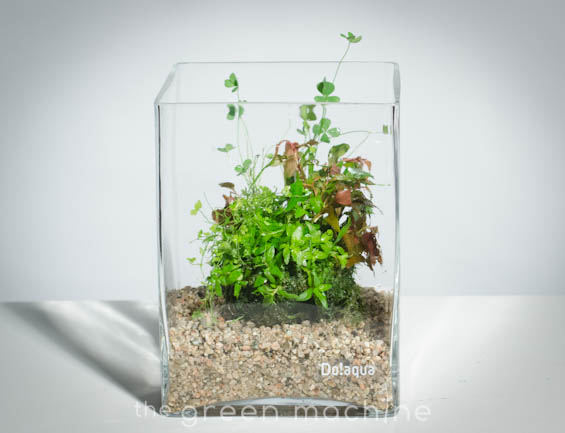
Then carefully place the planted Substrate Ball into the Plant Glass so that it is gently resting on the sand or gravel (below)
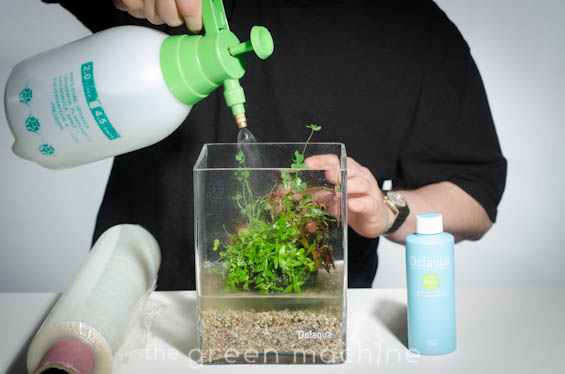
Mist the planted Substrate Ball with a good quality foliar fertiliser (diluted in accordance with the instructions). Do!aqua be Bright is specifically designed for use with Wabi Kusa (below)
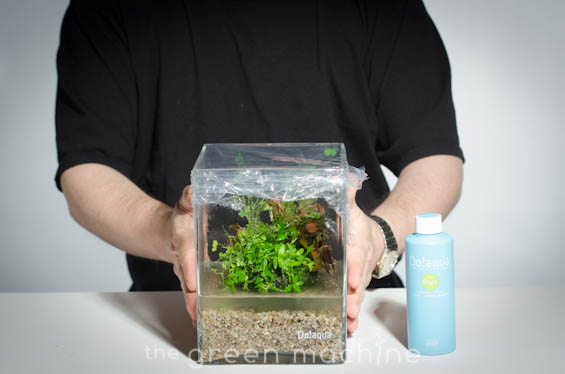
Next, cover the Plant Glass with cling film or a clear plastic bag so that the plants are in almost 100% humidity. This keeps the moisture inside the Plant Glass. Over the following 2-3 weeks, gradually reduce the moisture levels by placing holes in the plastic so that after 3 weeks (or 4 weeks in doubt) the plants are at room temperature. Then the plastic can be removed. This must be done to acclimatise the plants gradually to emersed growth because they have not yet developed root systems and cannot take up moisture properly through the roots until they are established, but if they are not kept moist they will lose water from their leaves and die quite quickly. once the plants are acclimatised this is no longer an issue but the plants should be misted at least once a day (preferably 2-3 times a day) and fertilised regularly with a good foliar fertiliser like Do!aqua be Bright.
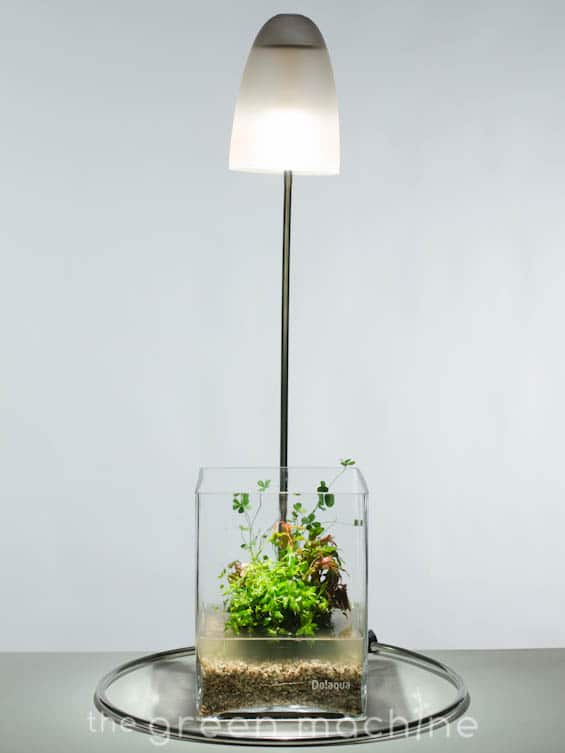
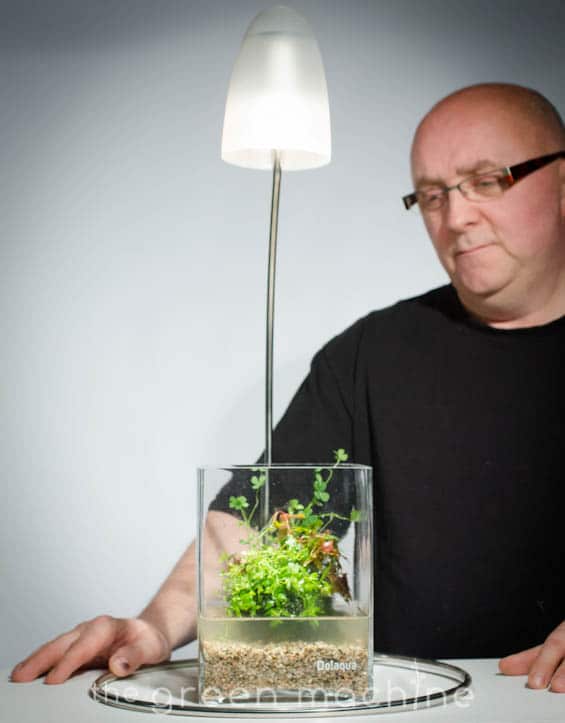
The image below shows the completed Wabi Kusa, although the plants are not yet established, and will look even better in a few weeks when they have grown in.
More Wabi Kusa content is coming soon….
Sign up to our YouTube Channel, newsletter and facebook page for all the latest updates
Read our article on Wabi Kusa here.
View another Wabi Kusa aquascape journal here: Wabi Kusa Oasis by James Findley
Video Transcript:
Welcome back to The Green Machine, the nature aquarium specialists.
This video documents James Findley planting a TGM Substrate Ball to make a Wabi-Kusa display.
James developed TGM Substrate Balls to allow Wabi-kusas to be created easily and successfully. Wabi-kusas are an exciting and inventive development in the nature aquarium world: they are fantastic for beginners and also provide experienced aquascapers with a new challenge.
Once you have your substrate ball, when it is still dry, the first step is to cover the ball in moss. Riccia can also be used. James chose Weeping Moss for the base of this substrate ball, but most mosses are suitable. At this stage, the substrate ball is solid.
To attach the moss to the substrate ball, use Riccia Line: loop it around the ball once and then tie the riccia line tightly. A pair of pinsettes is used to ensure that the riccia line is tied very tightly so that it does not come loose. Make sure you leave a small length of riccia line that will be long enough to tie the other end to once the winding is completed.
Tie the riccia line around the substrate ball at least 25-40 times in each direction to ensure that the moss is firmly attached.
James also added some riccia to the substrate ball for some extra texture and colour.
It is possible to create a wabi-kusa style ball without a layer of moss, but James likes to add a layer of moss for aesthetic reasons: when looking at a forest or jungle, the forest floor is carpeted in plant life and can be seen from above through the patches of foliage. If the base of the substrate ball is left bare then it creates a patchy, unnatural and less beautiful effect. Adding moss creates a more aged, realistic and chaotic impression.
Once the winding is completed and secured, the second step is to rehydrate the substrate ball. This must be done immediately so that the moss does not dry out and die. To do this, simply place the substrate ball in a waterproof, clear plastic bag with some water in it. Then place the bag in sunlight and leave it there for 2-3 days or until the ball is rehydrated and pliable enough to work with.
The third stage is planting. Hemianthus Cuba is added to the substrate ball. This is done by simply pressing the hemianthus firmly into place.
Then some polygonum is added. Using a pair of pinsettes, place a hole in the substrate ball, which will now be pliable. Then gently push the stem of the polygonum into place.
(04.40) the leaves are trimmed so that they will lose less water. When the plants are first placed in the substrate ball their root systems are not developed: trimming the leaves of the polygonum reduces water loss and improves the health and growth of the plant at this early stage: it will take around 2-3 weeks for the plant to develop a good root system
05.13 Marsilea Hirsuta is added. This plant is fairly tall so adds height to the display and has a lovely, 4-leaf clover-like appearance which is very delicate and interesting
05.40 for larger plants, a slightly bigger hole is made in the substrate ball so the larger root ball can be pushed in.
06.18 ludwigia sp diamaond red is added to provide a nice variation in colour.
06.50 when working with the plants in this way it is important to mist them regularly as the plants do not have proper root systems yet. Stem cuttings are particularly susceptible to water loss and should be treated with extra care.
07.15 staurogyne repens is added – this is a very stunning plant when it is cut back and create an interesting, carpeting effect so is particularly useful for the front of the display.
07.20 hydrocotle triparta is added. This plant cascades as it grows, creating a very wild impression. It is a fast growing, prolific plant.
07.40 the fourth step is to carefully lift the planted substrate ball into position in the plant glass, placing the best side forward. James has already added a layer of sand to the plant glass: any sand or gravel suitable for planted tanks can be used for this.
08.30 finally, the water is added and the planted substrate ball is fertilised with a good foliar fertiliser: 1 capful is added to 500 millilitres of water and then poured onto the gravel so as not to disturb the plants. The plants are then sprayed with water again and then covered in plastic (a waterproof plastic bag can also be used) so that the plants are in almost 100% humidity.
It is very important that the display is covered in plastic for around 2-3 weeks in order to acclimatise the plants to emersed growth: the plastic keeps the moisture inside. The humidity should be gradually reduced over the following 2-3 weeks by gradually placing holes in the plastic until the plants are at room temperature and normal humidity. Then the plastic can be removed.
This must be done to acclimatise the plants gradually to emersed growth as they have not yet developed root systems and cannot take up moisture properly through the roots until they are established. If they are not kept moist they will lose water from their leaves and die quite quickly.
Once the plants are acclimatised this is no longer an issue but the plants should be misted at least once a day (preferably 2-3 times a day) and fertilised regularly with a good foliar fertiliser.
Now the planted substrate ball is complete, you can see the appeal of Wabi-kusa: they are elegant, artistic and easy to look after and add a real sense of nature to any room.
For more videos, articles and planted tank tips, visit our website and sign up to our newsletter, you tube channel and facebook.
Bom Dia, I have recently happened upon Wabi-Kusa on Pinterest and would like to have a go at creating one. The initial problem seems to be obtaining a ‘substrate ball’. They don’t seem to be obtainable from Amazon and I’m sure I won’t find one anywhere in Portugal. I was wondering if I could make one myself please?
Regards,
Tim